🍕 Slice into Perfection with Every Lift!
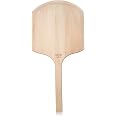
The New Star Foodservice 1029970 Restaurant-Grade Wooden Pizza Peel is a 16" L x 14" W kitchen essential made from sturdy basswood. Its tapered blade design allows for easy lifting of pizzas and other baked goods, while the smooth texture prevents oil absorption. With a 30" overall length, it ensures safety from heat, and its simple hand wash maintenance makes it a practical choice for any culinary enthusiast.
N**A
Works well
Nice size and weight. We treated with food grade mineral oil upon arrival and the wood is beautiful. Highly recommend.
B**A
Perfect for “At Home Pizza Ovens”
Perfect pizza peel for an “At Home Pizza Oven”! Handle is long enough to get the job done and short enough that you can store it in a cupboard. The wood is thin (but sturdy) and smooth with beveled edges.Overall, a well-crafted Pizza Peel!
M**V
Works well, but needs finishing
I bought this and it was completely fresh wood. I put pizza onto it and it quickly stained. I tried to wash it with soap and water but that made things worse!The wood was very soft and started to scrape away so I had to put some effort into finishing the peel.First, get the wood wet and wipe it down. This will make all the wood fibers start to stand up.Second, get some 220 and 320 grit sandpaper. Other grit will do but this is what I used. Sand it down until smooth to get a real nice finish. Wipe off the wood shavings.Lastly, buy some food grade mineral oil and put a healthy amount on one side and wipe it off with a cloth or paper towel. Do this for both sides. Repeat this process 2-3 times over the next 2 days as the oil gets soaked into the wood.Now you have a nicely finished peel that looks much better!
T**E
Light weight
This is my second wooden peel, the first I tried was 16 inch and was just too heavy. Returned for this one and its what I was hoping for in being light. The bevel along the edge is smooth and consistent, it doesn't 'jump off' like others. Its also beveled on the front and back. It arrived in good condition and due to other reviews on cracking I'll plan to oil routinely.
S**D
Making perfect restaurant-grade pizza at home - this pizza peal is part of it.
Here's the solution I found for a very useable home-based gas-grill pizza oven. This is the key to crispy chewy pizza thin-crusts, and tastes just as good as any wood-fired pizza restaurant (think Wolfgang Puck or California Pizza Kitchen). Oh, and the pizzas are far cheaper to make.The Dough: (told to me by a professional restaurateur) use any basic yeasted pizza dough recipe from the internet. Nothing special, no special flours or ingredients needed, just white flour, yeast, salt, sugar, water, a bit of oil. The key is to let the yeast over-rise. Yes - give it a couple hours, maybe punch it down a couple times. But let those little yeast buggers eat up every bit of sugar they can find. I often throw in a quarter cup of gluten flour which I suspect makes the dough extra stretchy, but I haven't compared this side-by-side, so I may be kidding myself. Roll it out and transfer the dough to this wooden pizza peal. Use plenty of corn grits or corn meal underneath to allow it to slide around. You’ll need this to maneuver it into the grill, which is a small trick but very learnable. I've learned to scootch the completed dough & toppings around on the peal with short quick horizontal shakes. (don't overdo it, or you’ll dump your hand-crafted pizza on the floor). Also try to keep the peal as dry as possible, i.e. don't get sloppy with the sauce, and use plenty of cornmeal.The Pizza-oven on the Grill: restaurant-quality pizza needs to sit in heat that's around 700 degrees F or even higher. Guess what - your typical home oven doesn't go that high!! Not even close. And you need that heat being strongly radiated from top and bottom. Otherwise, you'll burn the bottom waiting for the cheese to melt and bubble. Solution: buy a case of untreated simple clay flooring tiles. Make sure it’s untreated (no glaze, no decorations, no designs, you want the smooth surfaced ones). Home Depot sells 6 inch square tiles for about $30 bucks a case (30 pcs). Buying two commercial-made pizza stones will set you back more than $100, and if (more like when) they crack, you have to buy a new one. My pizza oven on a gas grill uses 16 of these tiles, and I've cracked a couple in the last year - easy to replace from the remainder of the tiles in the case. You need both a top layer and bottom layer of these tiles. To hold up the top layer, I use four standard clay bricks (also untreated), and some basic steel slats (from Home Depot). Put down one layer of tiles, and the bricks on edge on each end. Lay the slats across the bricks, and build the upper tile layer on top of the slats. You’ll have a heat compartment about 4 inches high, and as deep and wide as your grill will allow. I trained an IR temperature gun on the inside of the tile compartment built inside a natural gas-fired grill and it clocked in at about 750F, after heating up. That's a lot of thermal mass, so give a good 30-45 minutes to get up to temp. If you use a propane grill, it’ll get hotter than that. No worries - just watch closely and pull your pizza out sooner when it looks done. Either way, you’re going to be cooking pizzas for about 3-4 minutes instead of 10 or 15. (more on that later).The Method: I found (the hard-way) that you need two pizza peals – one wood (to put in) and one metal (to take out). I first only bought the metal peal (Kitchen Supply 14-Inch x 16-Inch Aluminum Pizza Peel with Wood Handle), but found that metal just grabs wet pizza dough and you can’t easily get the pizza to slide off into the hot oven. You wind up having to use your fingers or a spatula, neither of which is well suited for 750F. Using the handle only, you want to be able to slightly shake the peal and gently scootch the pizza off onto the grill. Metal isn’t suited for that. So I ended up with a wooden peal (New Star Foodservice 50394 42-Inch Wooden Pizza Peeler with 20-Inch by 22-Inch Blade). That worked perfectly. Now I roll out the dough, move it to the wooden peal (lots of cornmeal/grits underneath), build the pizza (sauce, toppings) while it’s on the peal. Then take it directly to the oven and slide/scootch it in, and close the lid. THEN SET YOUR WATCH. This is important. If you’re used to it taking 10 or 15 minutes to bake a pizza, you’ll find your perfect creation to be a burnt mass of carbon if you wait that long. Depending on how hot your grill is and how thick you made your pizza, you’ll only need about 3-4 minutes before taking it out. This is where the metal peal comes in. The wooden unit is actually fairly thick (1/2” or so). It’s not going to easily get underneath the baked pizza, and after awhile, jamming the wooden peal on top of 750F tiles isn’t going to leave it in very good shape. That’s where the thin metal blade of the other peal comes in. It’s perfect taking out the hot pizza and leaving the tiles in good shape for the next one.That’s it – two pizza peals, one gas grill, a case of tile, some bricks and steel slats. You have all the makings of a perfect commercial grade pizza oven.
T**N
NOT LIKE GRANDMA'S PIZZA PEEL, BUT IT CAN BE!
This pizza peel is just the right size, sturdiness, and price I was looking for, however, you get what you pay for in this case. In order to make it shine like a grandma's old peel (and make it 5 STAR quality) you will need to perform the following: 1. First wash the board with dish soap and let it air dry. 2. After drying, the grain will be raised and rough, requiring a light sanding with 400 grit sandpaper. 3. After sanding, liberally coat the board with mineral oil (at least 4 oz.) allowing it to soak into both sides of the board over and over again during a 60 minute period, then let the peel set overnight. 4. Wipe off any excess oil and wash and air dry again. 5. After drying, the grain will be slightly raised again, so sand the peel with 1500-2000 grit sandpaper. 6. Polish the peel with isopropyl alcohol and a dry towel to remove any excess oil and repeat sanding again if desired. I used a random orbital sander to give the wood a glass-like smooth finished surface. 7. Drill a 1/8" hole in the handle, and then enlarge the hole to 3/8" by drilling 1/2 the way down on both sides in order to avoid splintering the wood. Smooth the hole edges using a round file. 8. Now hang the peel on a wall to show it off and keep it out of the way due to its great size! 9. Re-oil the peel frequently to prevent the wood from drying out, and to keep it water resistant and non-sticking . Do not soak the board! Do not cut pizza on the board, as it will ruin the finish! Those who have complained about this peel likely did not oil or sand it, which is an absolute requirement to prevent it from sticking, warping, cracking, and becoming unglued. BOTTOM LINE: I NOW LOVE IT!
L**Z
Works well !!
Perfect !!
T**N
Works Well but cracked.
I use parchment paper and cornmeal under my dough. The pizza slides perfectly on to my preheated piping hot stone in the over. My only issue is the crack in the wood. Thank you.
Trustpilot
2 months ago
2 months ago