


Elevate Your Space with Style! 🏡
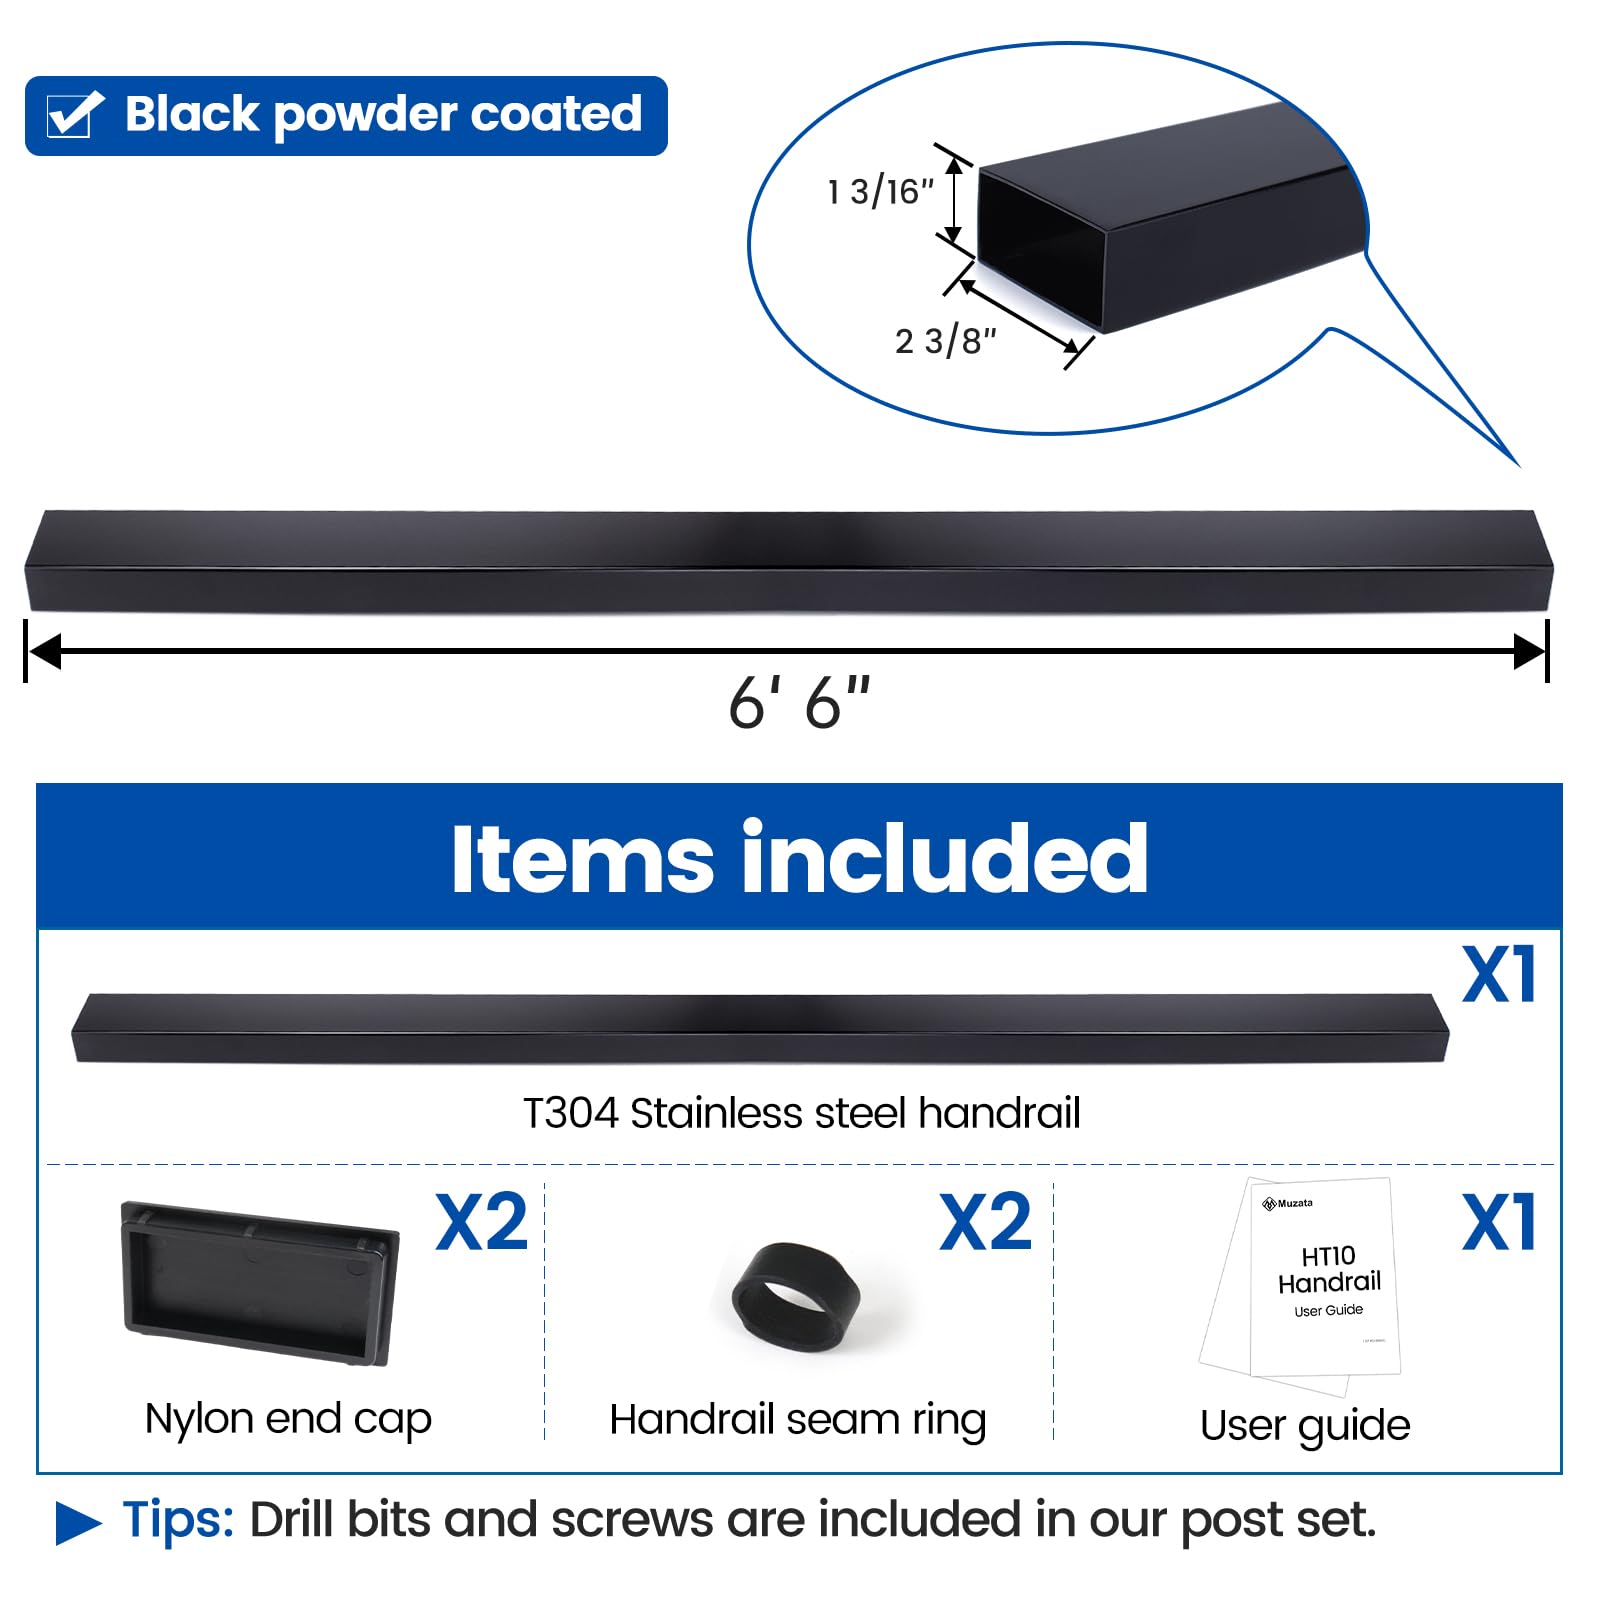
The Muzata 6'6" Stainless Steel Handrail is a premium, rust-proof railing solution designed for both indoor and outdoor use. Featuring a seamless design and advanced 4-layer spray painting technology, it combines durability with modern aesthetics, making it the perfect choice for stylish home renovations.
| Item Weight | 4.04 Kilograms |
| Item Dimensions | 3 x 2 x 79 inches |
| Item Shape | Rectangular Prism |
| Item Form | Rod |
| Color | Black |
| Material Type | Stainless Steel 304 |
A**R
Upgrade to the max
We had a wood rail and wanted a more modern, easier to clean railing. We ordered Muzata railing system and installed it ourselves. The videos that Muzata put out are very user friendly and it turned out better than we’d hoped. Love it! FYI: We were not able to cut the steel hand rail, so took it to a local machine shop and they cut it for us for a nominal fee. Was worth every penny! Highly recommend this railing system!!
A**N
Look awesome!
I am not finished with project yet. But they look awesome! My only complaint, it didn't come with any hardware. I spent $500 on their 4 piece 6.5 ft set. You would think for $500 it would come with screws to attach it. This is not a pre drilled handrail. Understandably because every stair case/setup is going to be different. I used my side grinder to cut handrail. When attaching it to post, I used 8 - 1 inch metal to metal self tap screws. I pre drilled 1/8th of inch holes first. It is sturdy and worked great.
V**R
Stainless rails too difficult to fasten.
The tips of the self tapping screws burnt out before penetrating. tap and die I purchased did not match the threads on the screws provided. I ended up filling the rails with wood and securing in place with wood screws. I would recommend using the aluminum handrails From the same manufacture, MUZATA
T**N
Not bad
After fabricating mounting plates so I could use them on a post the same width they were perfect for the project.
N**B
Good quality, but more difficult than it needs to be
I don’t usually review things, but I wanted to document some things that people should know to avoid my headaches.- This is a steel handrail, not aluminum. You’ll need a miter saw with a blade meant to cut steel, otherwise you’re going to have a bad time. Even then, it takes some effort. If you’re cutting this, you’ll probably want a metal rasp to smooth the edges. Consider the aluminum product for DIY.- Hilariously, the instructions for connecting the posts to the handrail with screws show someone using a manual screwdriver and casually screwing them together right up in to the handrail. Again, this is thick steel. You can’t hand screw them in. You can’t use an electric screwdriver either. You need to pre-drill the holes.You will need drill bits made for metal (cobalt bits, for example). If you have a drill press, this may be easier.- I’m not going to count it as a negative for the handrail review (it’s an issue with the posts), but the holes to connect screws to the hand rail don’t extend out past the posts, so you have to screw them in diagonally. It’s a huge pain trying to drill screws into steel with poor leverage. If I included it in this rating, this would almost be minus two stars by itself.- Finally, it would be nice if they sent some touch-up paint/filler in the proper color to patch the seams when you make cuts. They do provide little rubber bands that you could use to cover seams on a long horizontal, but they literally can’t be used on corners due to the post being directly underneath.All in all, it’s a cool product line from Muzata. A few changes would make it a lot better.
P**D
Stairs
Great product
C**.
Scratches easily
Installing a handrail by yourself can be difficult. I had to modify the rail to it would be fastened against the wall. This handrail needs to come with the wall mounts for the price you pay. Having to pay $30 for plastic end caps is absurd.
R**Y
Happy with the end product but not for beginners.
Very happy with the before and after result. My take aways are the following, hopefully it saves the next guy some time and headache:- Use a post level to level the posts. Almost all of my posts required some shimming.- The instructions for everything with these are difficult to compile. Some keys for the beginner, install the posts, then the rails, run cables starting with the middle cable, then the one below the middle, then the one above the middle, and so on until complete.- When cutting the cables I precut all of mine. I initially cut them to length measuring from the anchor side to the far side of the end post. For posts on level ground I then trimmed off 1" and for the angled ones on the steps I cut of 5/8' to allow room for adjustment.- Use the larger adhesive gromets when going down the steps, the tension is too much on the small ones and they do not stay in place.- **If you select the stainless products use either the drill bits sent with some of the products or get bits capable of drilling stainless or you will not get through the material.- I found the fasteners sent with the product to be junk. Many of them ended up being lose in the holes and not tightening. Save yourself the trouble and order these but still drill a pilot hole (Self Drilling 1/4-14 x 3/4) : https://www.amazon.com/Project-Center-41887-Washer-Drilling/dp/B007HV933U
Trustpilot
2 months ago
4 days ago