🥄 Craft Your Perfect Yogurt Experience!
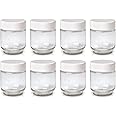
The Euro Cuisine YMX650 Automatic Digital Yogurt Maker allows you to effortlessly create fresh, probiotic-rich yogurt at home. With a 42oz capacity and 7 reusable glass jars, it offers a simple, set-and-forget operation with a blue LED timer. Enjoy a variety of flavors while ensuring a healthier choice free from additives, all backed by a 3-year warranty.
C**R
In love with the coconut milk out of this yogurt maker!
I bought this so that I could still have yogurt during these shelter in place times. I was a bit dubious if I could pull off a coconut milk yogurt since I have no idea what I'm doing. I tried to make yogurt in an Instant Pot that didn't have a yogurt setting (due to air frying in its place), and that was a sorry disaster. This EuroCUisine is defintely the way to go.IMPORTANT: You don't just take a spoon of magic yogurt powder and stir it with coconut milk and then pour that liquid combo into the EuroCuisine jars and turn on the Eurocuisine machine and walk away. It's WAY MORE COMPLICATED THAN THAT, AND ALL THE HARD PART COMES BEFORE YOU GET TO USE THE EUROMACHINE. All this machine is, it's a heater that has a temp that's right for incubating yogurt and a timer that shows how many hours (not minutes) have elapsed. That's it.So, before you get to use the EuroCuisine, you have to make a concoction using a saucepan on a stove and a thermometer and yogurt starter and that sort of thing. None of the stuff you need to do the tricky part comes with the Euromachine.WHAT I DID: I bought a yogurt starter on Amazon that would work with vegan yogurt. I followed the directions on the vegan yogurt starter packet for the temperatures that the coconut milk in the saucepan had to be heated to (and not above or you kill the magic yogurt bacteria), etc. Sadly, even that's not enough info though. I researched online and found out that to make thick and creamy coconut milk yogurt (as opposed to watery yogurt soup), I needed to add a little maple syrup and a little agar powder at just the right time to the coconut milk in the saucepan so the yogurt starter has what it needs to work best.In other words, if you want to do coconut milk yogurt you need to research online because timing & temperature is everything re when to add the agar powder and when to add the maple syrup verses when you add the yogurt starter.ALSO IMPORTANT: It's all easy once you noodle it out, but you have to take the relevant info off the yogurt stater packet, the relevant info re maple syrup and agar powder off the web, and then the eurocuisine has its own operating instructions, none of it rocket science but it requires a bit of thinking and organization beforehand. Because I used cocounut milk, I use the EuroCuisine for around 13 - 14 hours and after being in the fridge overnight it WAS PERFECT thick and creamy and tasty. I was in shock it was so good.Re the coconut milk, I used enough unsweetened coconut milk, mixed with one small can of unsweetened coconut cream, that all together would fill all seven EuroCuisine jars. Each jar holds about 2/3 cup, fyi.I also bought a thermometer for hot liquids on Amazon. I used that to make sure that I met the temperature requirements on the yogurt starter packet. Can't be too hot and can't be too cold.THe reviews about the jars having lids that don't close perfectly are true. The Eurocuisine jars are good jars to make the yogurt in, they are good jars to store in fridge, but if you were planning on packing a lunch, then you'll need to use a different glass jar with tight lid for taking in lunches (I bought those lunch jars off of Amazon too, I think they were meant for taking baby food but hey at least the baby food lids are pretty colors).The reviews about the Eurocuisine lids not being the best to keep clean probably true too, but I'm not too nervous about it, I just let it dry extra long on the counter. If I start to see mold as some reviews worry about, well then I'd just transfer into the baby jars sooner. (You don't use the Eurocuisine lids on the jars when you're making the yogurt fyi, they're just for storage anyway).The reviews talking about the shape of the glass jars not being super user friendly for cleaning also true, but that's an easy fix - just soak in water for an hour and then the glass parts of the jars rinse clean pretty easily.SO that's it! Happy yogurt making!
C**C
Homemade yogurt=yummy
I love it. Made my first batch and it came out amazing. Simple method, individual jars. Everything I was looking for. The yogurt tastes really fresh! If you eat a lot of yogurt and are tired of grocery store prices, buy it. You won't regret it.
C**R
Use a Water Bath for an Even Temperature
I chose this brand partly for the glass jars. Many makers come with plastic jars or tubs. ( As C. Li and Donna Mom note, these jars have a hard-to-clean groove around the bottom--but that's what tiny stiff brushes are for.) If you hate the jars, the 7 qt Pyrex bowl many people use instead is only a few dollars. I chose the slightly pricier YMX650 for the longer, 15-hour timer, the flattish top (for parking lightweight things on), the automatic shut-off, and even the digital controls (mechanical controls are so shoddy these days, even the digital junk seems slightly better). The plastic cover is sturdier than it looks; when I dropped it on a tile floor (not on purpose!), it landed on one edge and bounced without cracking. Every yogurt maker I looked at was made in China. I suspect they're all made in the same factory, with the same working parts. This brand has a good track record, but so do a few others. If another model or brand strikes you as a better fit, who am I to tell you what to buy?The Euro Cuisine YMX650 Yogurt Maker draws only 13 watts, about the same as a good light bulb. It insulates well enough that you can leave the yogurt in the machine after it turns off and get a free hour of heat. As far as I can tell, all yogurt makers of this type are simply plastic enclosures with a heating element inside. Any temperature sensor is under the plastic bottom getting an indirect reading. It's not perfect, but with a bit of tweaking it works well, and is probably as good as it gets for under a hundred bucks. If you insist on real temperature control, you're going to need to drop $150 on the Brod & Taylor Folding Proofer. ( If your yogurt maker is heating to 130 degrees, no amount of tweaking will work because your unit is defective. Return it immediately for a refund or exchange.)These simple heaters sometimes heat unevenly. Reviewer A puts a few paper towels under the jars for insulation. I didn't want insulation so much as moderation; the bottoms of the jars were a little hot--115 degrees, but the tops of the jars were a little cool--100 degrees. I had used a water bath in my (unsuccessful) attempts to make yogurt without special equipment, so tried pouring about 1/2 inch warm water in the bottom of the yogurt maker, where the jars sit. This works like a charm to even out the temperature to about 108 degrees. It does evaporate some, adding to the water vapor the yogurt alone generates. Others have had problems with condensate dripping into their yogurt, but I've found the water all drips down the outside. ( It dribbles out the join between cover and bottom and puddles under the machine where you won't see it. It does this without a water bath, too, so make sure to use it on a water-resistant surface.) Although the temperature is uneven without the water bath, it hasn't drifted after dozens of uses, so it seems like it will last for years. We'll see. Also, it has stayed between 104-112 degrees (with water bath) whether the room temperature is 60 (winter) or 80 (summer), so maybe the temperature control is better than I thought.If you are lucky enough to have one of those ovens that culture yogurt perfectly overnight, you can skip this purchase. (I have to laugh when people brag that they don't need to waste $40 on a yogurt maker because their $3,000 oven can do the job.) Nobody I know has an oven capable of maintaining 105 degrees Fahrenheit for hours at a stretch. By turning my 20-year old oven on for two minutes every twenty minutes I can keep it between 90 and 120 degrees--not really a practical method. ( If you have one of those magical ovens, treasure it.)I use this to make the unsweetened soy yogurt I prefer. Since WholeSoy went belly-up I've been forced to learn to make my own. It took a few tries to get it right (commercial vegan yogurt didn't work as a starter). Since I've been using WestSoy Organic Unsweetened Soymilk, Cultures for Health Vegan Yogurt Starter and a water bath, I've made dozens of batches without a single flop. I've been adding a tablespoon of cashew butter to a quart of soy milk for a decadent taste without the expense and blender use (I don't own one) of Miyoko Schinner's cashew-heavy recipe . That's all I use for thickener. I culture it for 10-12 hours for good, tart yogurt.
Trustpilot
2 months ago
5 days ago